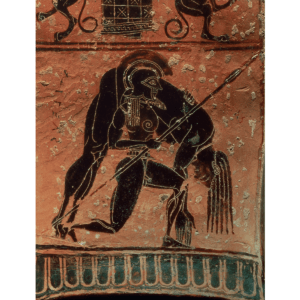
Each year I try and carve a pumpkin with a design from antiquity. In fairness it’s been all Greek designs so for. This is mainly due to Greek vase designs being very suitable for a pumpkin, for a starter it’s a curved surface. One thing I’ve learned since doing these is how much that curved surface makes a real difference.

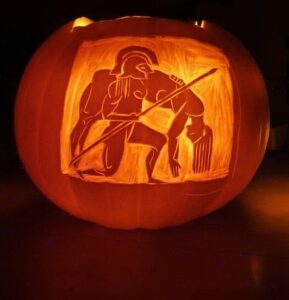
This year I thought I’d give a mosaic design a go. Well, it was the idea of Fishbourne Roman Palace who have this famous mosaic.
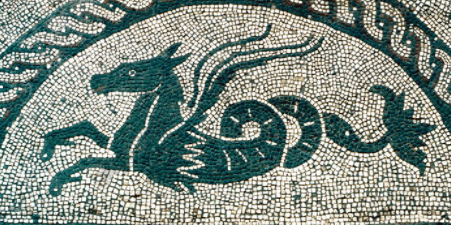
It’s a hippocampus, a mythological creature (half horse and half dolphin) which featured in mosaics. It’s a tricky design but if I can give it a go then I guess most people can.
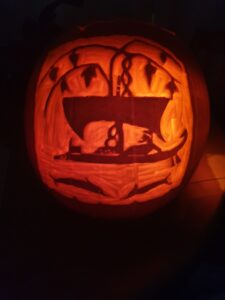
Here is another carving I did in 2022.
What you will need.
Pencil (probably more than one).
Tracing paper.
Lino engraver (this is essential).
Scalpel (for finer details). These can be bought from craft shops (like the lino engraver). Please be careful though.
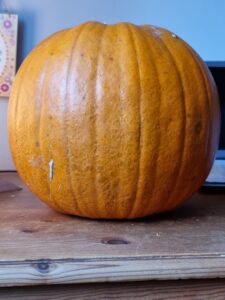
The right pumpkin.
A good pumpkin for this design is a pumpkin with a good area for the design. The curved surface will be tricky as it will stretch out the flat image, but that’s part of the challenge.
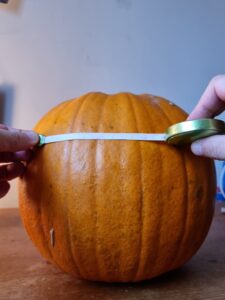
Once you have a pumpkin measure out the area so you know how big the image needs to be.
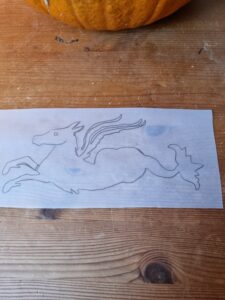
I traced out the image and used it to draw on the pumpkin. It won’t mark through and you shouldn’t look to pierce the pumpkin skin, but if you can use a pencil to leave a creased line in the skin this gives you a rough outline to work with.
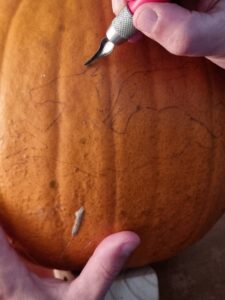

Next up use a lino engraver to start removing the area around the marked out image. It’s incredibly important to start away from the image. The temptation might be to start on the outline itself, but that can be dangerous. Work from outside to in, by that I mean very gradually work up to the lines. I’ve made the mistake a few times of taking too much skin away, once you have done this you can’t put it back! Also it allows you to get used to the consistency of the flesh (yes, I know how that sounds). Patience is key. This design took around 90 mins to carve.
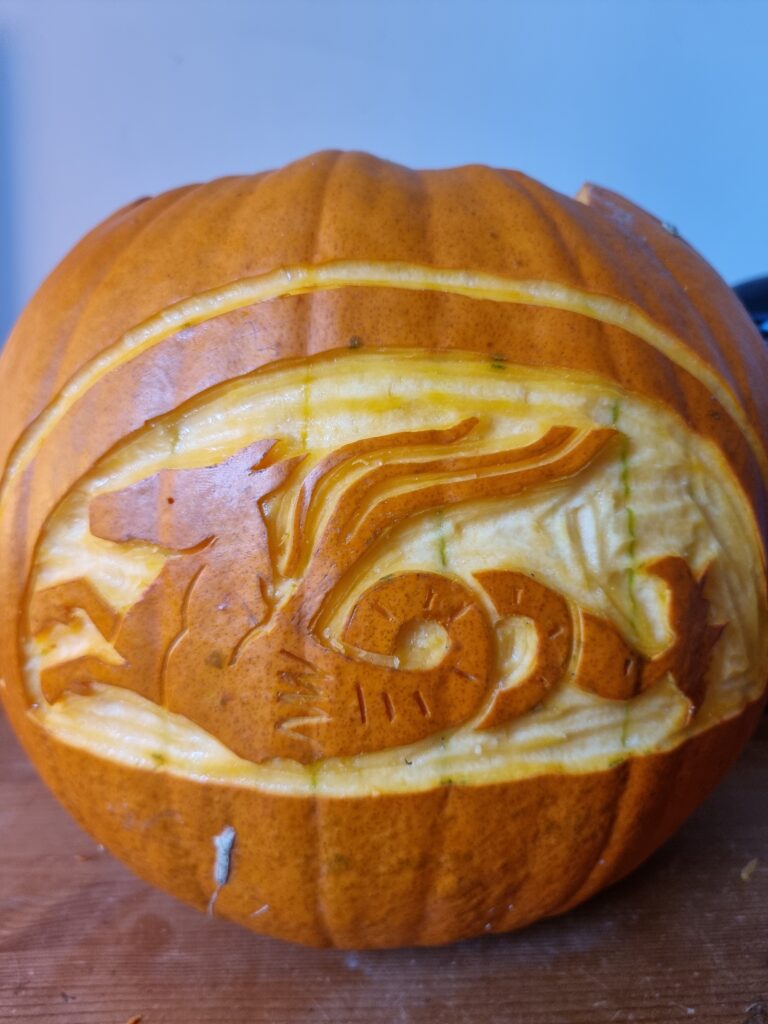
This is the result. The idea is that the dark parts of the design will be made so by the skin, you can help by thinning the wall on the inside of the pumpkin. Be careful though.
The pumpkin will also leak a bit so sometimes it’s good to step back and leave it to dry for a bit. You want those lines as clean as possible, this is where the scalpel helps. The lines in the tail were made with the scalpel as the engraver (eve with the smallest blade) was too wide.
Result.
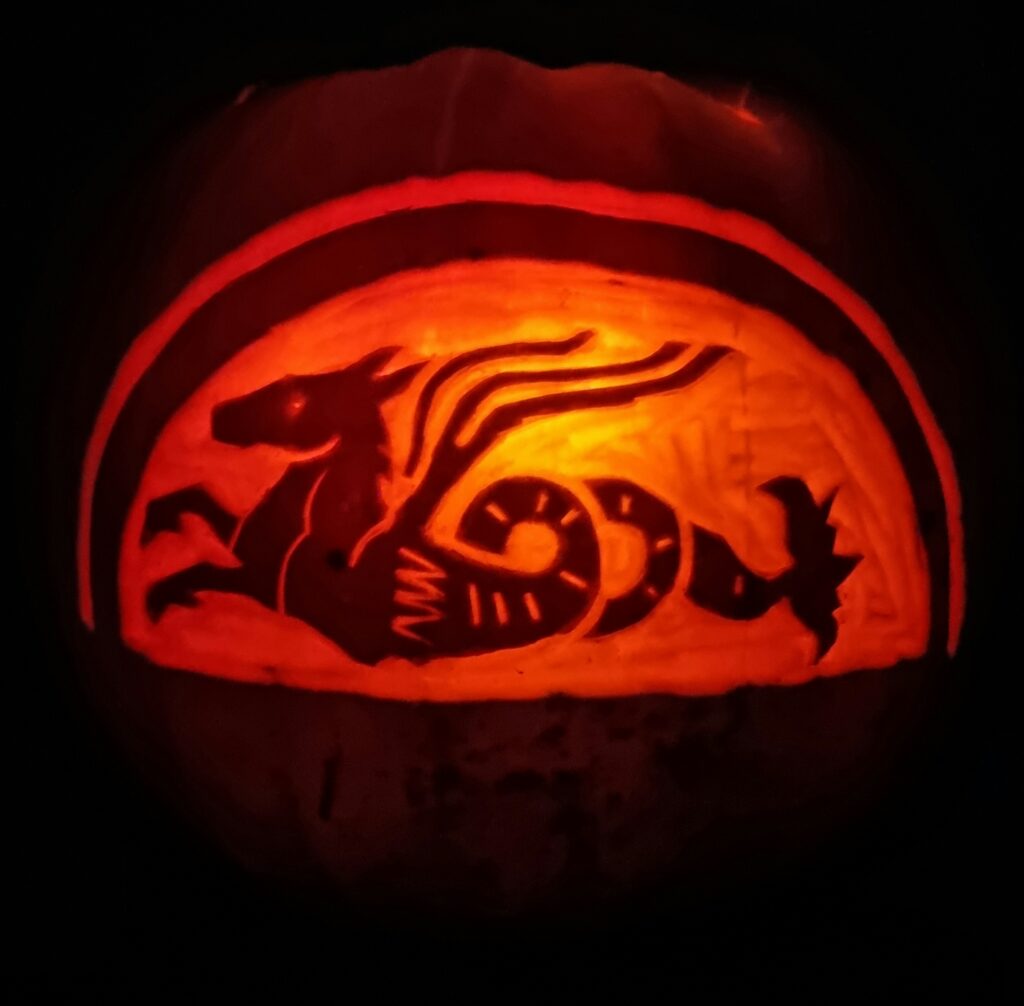
If you are using a battery light it might be easier, if you are intending using candles then cut a slot at the back of the pumpkin so air can get in (otherwise the candles will go out as soon as you put the lid back on).
For extra detail use a needle to poke through the design. This will give an extra level of light and it can be a nice effect. I used it here for the eye, use sparingly as an option though.